
The wheel and tyre Bible, covering everything you need to know about wheels, tyres or tires, rim sizes, tyre tread, tread depth and tread wear, tyre markings, aquaplaning, wheel balancing, aftermarket wheels, alloys, TPMS tyre pressure monitoring systems and much more.
The Wheel & Tyre Bible
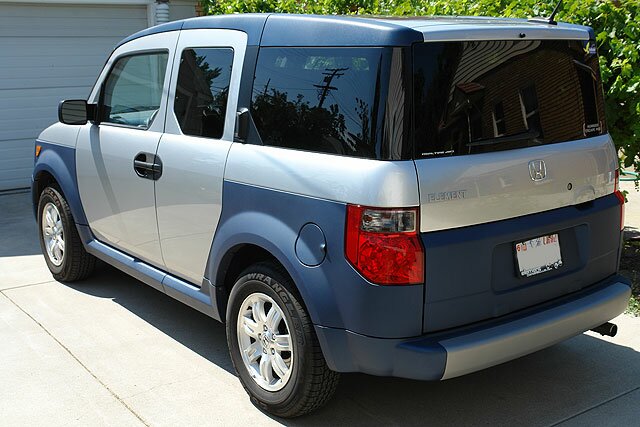
A case study - changing the wheels and tyres on my Honda Element
If you're considering changing your wheel and tyre combo, this case study might help you with the general though processes and order of events. Here I show you the processes I went through when changing the wheels and tyres on my Honda Element.
Gather the data
First up, gather the data on the existing tyre and wheel combination. For the Honda element, the wheel size is 16x6 with an offset of 42 and a 5x114.3 bolt pattern. The tyres are 215/70 Q R16 with a load rating of 99.
Choose the basic wheel and tyre size
Next, choose the basic wheel and tyre size you're looking for. I wanted to go up to an 18 inch wheel which meant my tyre profile would go up from 215 to 225 or 235.
Research your choices
Using online tyre sites like TireRack and Discount Tire Direct, you can find a selection of wheels that will fit your vehicle, and filter them by the basic sizes you chose above. In my case I spent about a week looking at different sites, comparing the wheels and photoshopping them into a photo of my car to see what they would look like. Most online vendors have some sort of visualisation capability to show you what the wheels will look like on your car. Being a CGI artists, I did it myself (see below).
Once you shortlist a couple of different designs, check the forums for your particular vehicle and see if anyone has any comments one way or another. I used the Honda Element Owner's Club as my main tool, looking for reports of badly-fitting wheels, rubbing and fouling problems, and general comments about the tyre longevity and such. Using that forum I shortlisted a couple of different tyre choices based on user opinions.
|
From the Element Owner's club site, I shortlisted the following tyres based on owner comments: Toyo Proxes S/T 255/50 R18 BF Goodrich G-Force T/A KDWS 245/55 R18 BF Goodrich G-Force T/A KDWS 235/50 R18 Michelin Pilot Sport A/S 245/45 R18 Yokohama YK520 225/60 R18 Yokohama YK520 235/55 R18 |
I also found that these were the wheel sizes being run by various other owners that were known not to cause any issues: 17x7 ET48 and 225/60 R17 Speedo error -0.79% 18x7 ET38 and 235/50 R18 Speedo error -2.15% 18x7 ET38 and 235/55 R18 Speedo error +1.17% 18x7.5 ET35 and 235/50 R18 Speedo error -2.15% 18x7.5 ET42 and 225/60 R18 Speedo error + 2.8% 18x7.5 ET42 and 235/50 R18 Speedo error -2.15% 18x7.5 ET42 and 245/55 R18 Speedo error +2.73% 18x7.5 ET42 and 255/45 R18 Speedo error -2.93% 18x7.5 ET45 and 235/55 R18 Speedo error +1.17% 18x7.5 ET45 and 255/55 R18 Speedo error +4.28% 18x7.5 ET48 and 245/55 R18 Speedo error +2.73% 18x8 ET35 and 255/50 R18 Speedo error +0.58% 18x8 ET40 and 225/60 R18 Speedo error +2.8% 18x8 ET40 and 235/50 R18 Speedo error -2.15% 18x8 ET40 and 255/45 R18 Speedo error -2.93% |
Do the maths
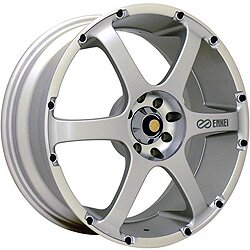
This is where it gets important. Once you've chosen a good wheel and tyre combination, you need to make sure they're available in a size that will work for your car. In my case I chose the Enkei RS6 rim which comes in an 18x7 size with an offset of 38. The 38 offset is 4mm different to the 42 offset on the factory wheels, but it's close enough and according to the owners who had wheels with similar configurations, the RS6 doesn't cause any bodywork or suspension fouling problems.
For the tyres I had a couple of options. I settled on the Yokohama YK520 tyres. They come in a couple of 18 inch sizes that were close to what I needed. The stock size is 215/70 R16. The 18 inch options for the Yokohamas are 225/60 R18 and 235/55 R18. Using my tyre calculator, the 225 section tyre gives a speedometer under-read of 2.8% (meaning I'd be going faster than indicated) whilst the 235 section tyre gives a speedometer under-read of 1.17% (meaning I'd still be going faster than indicated but with less error). I elected to go with the slightly larger tyre so that it matched as closely as possible the OEM diameter, meaning I had the minimal speedometer error. The ideal size would have been 225/55 R18 which would have been nearly identical to the factory spec tyres but it wasn't an available size in the tyre I wanted.
Consider other factors
Weight is a factor in choosing a new wheel and tyre combination. On the Element, the stock tyre weighs in at about 11.4kg whilst the wheel is about 8.1kg, so the unsprung weight of each wheel and tyre is about 19.5kg. The wheel I chose weighs in at about 10.8kg whilst the tyres come in at about 13.6kg so the new weight of each combo is going to be 24.4kg - nearly 5kg a wheel heavier. On the Element this doesn't matter too much because it's not a performance vehicle, but by changing wheels and tyres, I elected to add 20kg to the weight of the vehicle - all unsprung weight which is the worst kind because it's extra weight the engine has to turn to propel the car forwards. However, to put it into perspective, one of the wheels I was looking at - the Granite LK1H - seemed to live up to its name. The wheel was 14.6kg on it's own. If I'd gone with that combo, I'd have been adding 35kg unsprung weight to the car! If you're looking to do this sort of change on a performance car, you need to check the weights involved. TireRack have good data on a lot of the wheels, but if you can't find what you want from the online sites, call the sales lines for the manufacturers involved. They will always be able to tell you the shipping weight of their wheel or tyre. Tyres ship bare, so the shipping weight is the weight of the tyre. Wheels ship in between 1.3kg - 1.8kg of packing material, so you can take that off the shipping weight to get a guesstimate for the wheel weight.
Check the ratings
Something that often gets missed is checking the tyre ratings. The factory tyres in my case had a Q speed rating (good to 100mph) and a 99 load rating (good for 775kg per tyre). The new Yokohamas had a Z speed rating (good to 150mph which is well in excess of anything you're ever going to reach in a Honda Element), and their load rating was the same as the factory fit items. This was something I took into consideration with the BFGoodrich tyres - their load rating was 97 - rated at 730kg per tyre, or 45kg less per tyre. Some quick research and I discovered that the kerb weight for a Honda Element is around 1,660kg. Honda claim the payload capacity is 300kg which is a little low, but what the heck - assume a laden weight of around 2,000kg. Four tyres with a load rating of 730kg each give a total load capacity (assuming even weight distribution) of 2,920kg. So even by reducing the load rating of the tyres, using the BFGs I would still have had nearly a ton of excess capacity - 230kg per tyre - which would have been more than enough overhead to not be worried.
Pony up the cash and place the order
Once you know what you want, shop around locally first and see if anyone can supply what you need at a price close to what you'd be quoted on the internet. In my case the internet price was $1,173 which was for the four wheels with four tyres fitted and balanced, four hub-centric rings (the fitting kit) and the cost of Fedexing it all to my house. My local Discount Tire could get the same wheels and tyres and fit them at their store for $1,190 (after some haggling). The extra bit of cash is neither here nor there when it means I've got a physical store to go back to if something goes wrong.
What to expect on the day.
This may be teaching a lot of you to suck eggs, but a lot of people won't know what to expect at a tyre fitting store, so here's a quick rundown. Excuse the picture quality - these were taken with CrappyCellphoneCam™
| Here they are - a stack of boxes fresh from Enkei with the new wheels in them. | 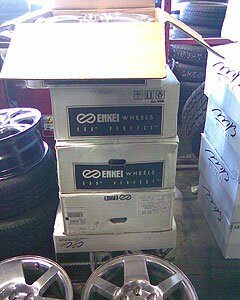 |
It's a good idea to check the wheels for damage before they're fitted. It's rare that anything happens in shipping but you just don't know. | 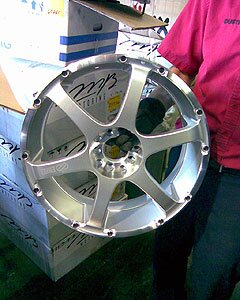 |
| Once your car is pulled into the bay, it will be jacked up either using hand jacks like this, or using hydraulic floor jacks. | 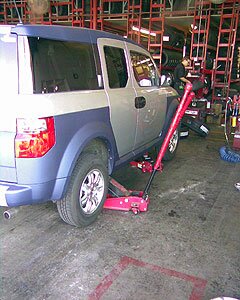 |
Here you see my Element totally wheel-less and sitting on 4 trolley jacks. I'm not a huge fan of this method - they don't put axle stands under the vehicle so if one of the trolley jacks fails, the whole thing can become unbalanced and fall off. That Would Be Bad. | 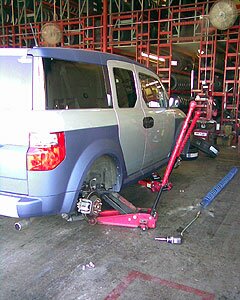 |
| 4 used wheels and tyres. It's a good idea to keep them. Notice in this case the wheels have been marked with chalk so you can see where they were if you need to put them back on. The one at the back is labelled "LR" - left rear. | 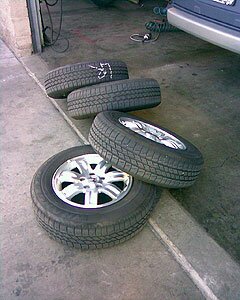 |
This is the machine used to get tyres on and off the wheels. Here you can see one of the techs putting the new tyres on to the wheel. The machine clamps the rim and then uses a fixed lever to roll the tyre bead over the rim until it pops on. The tech then inflates the tyre and in some cases you'll get a loud bang as the beads pop into place. It's a shock when it happens but its perfectly normal. | 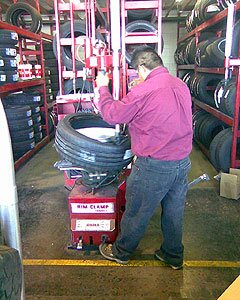 |
| This is the wheel balancing machine. The wheel and tyre are fixed to it, then it spins and measures any wobble induced by the wheel and tyre combo. The tech then manually spins the wheel watching a display which will tell him where to stick a wheel balance weight, and how much weight to use. | 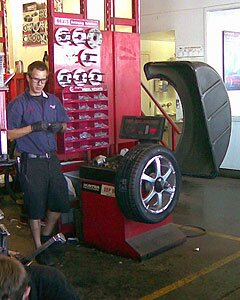 |
Finally, the wheel and tyre all mounted up and ready to be reattached to the car. Most places now have stopped using the airgun as the final way of doing this. They will use the airgun to get the nuts or bolts started but once they're seated, the techs will come around with a torque wrench and torque the nuts or bolts to the correct setting. | 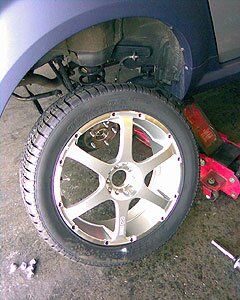 |
| One last thing - make sure you have either a contract with the tyre place to store your old wheels, or a way of getting them home. You'd be astonished how many people forget this last and somewhat critical part. Most tyre places will bag the old wheels for you so the dirt doesn't mess up the inside of your car. | 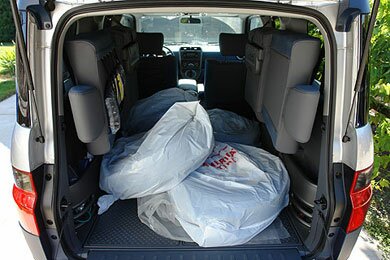 |
||
| Finally - check your tyre pressures yourself when you get home, just for peace of mind. When I wrote this article, the pressures in my tyres were 43psi, 35psi, 33psi and 34 psi when I got home. 4 different guys had worked on the 4 corners of the car, and so I guess I ended up with 4 random pressures in the tyres. | |||
The results.
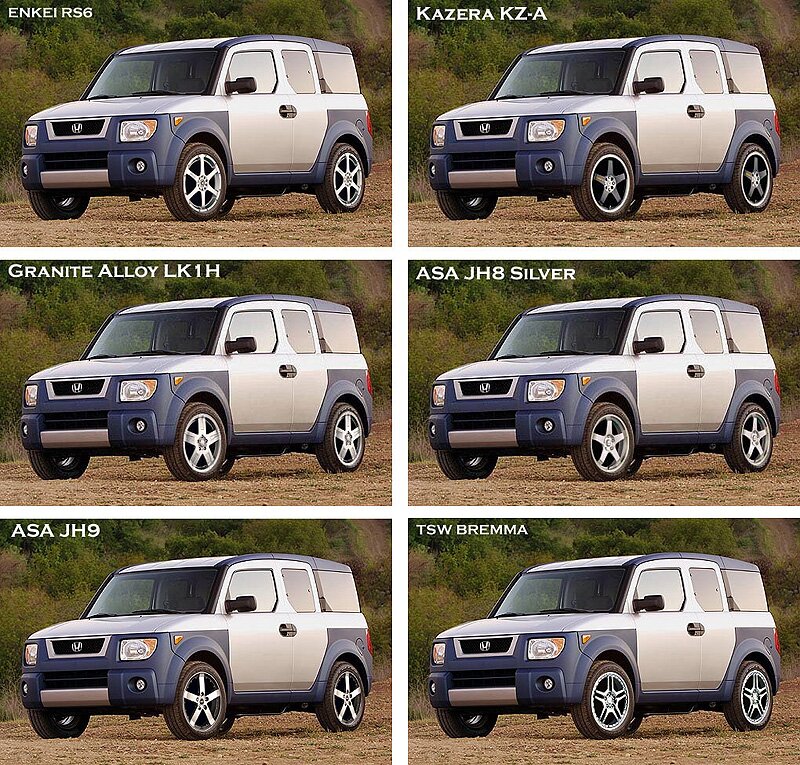
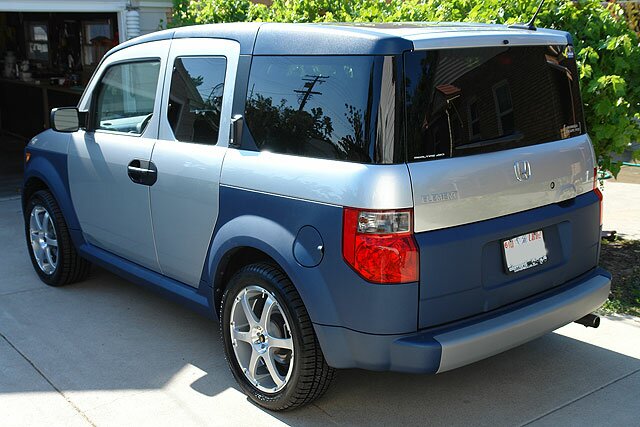
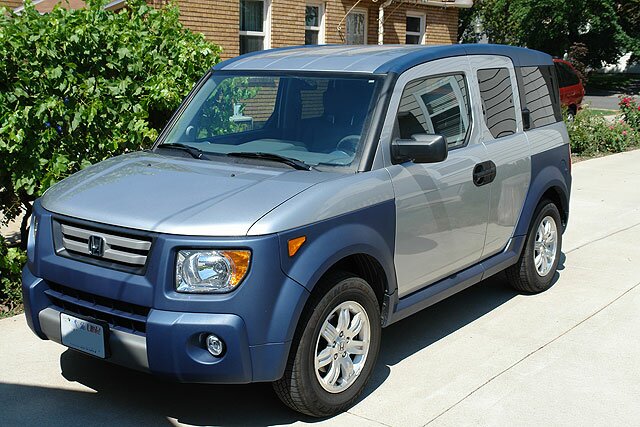
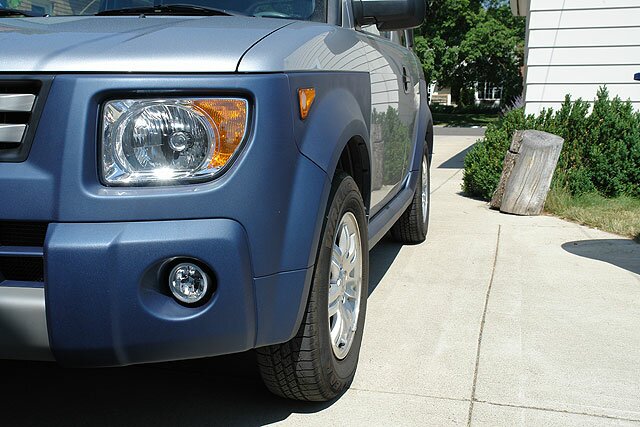
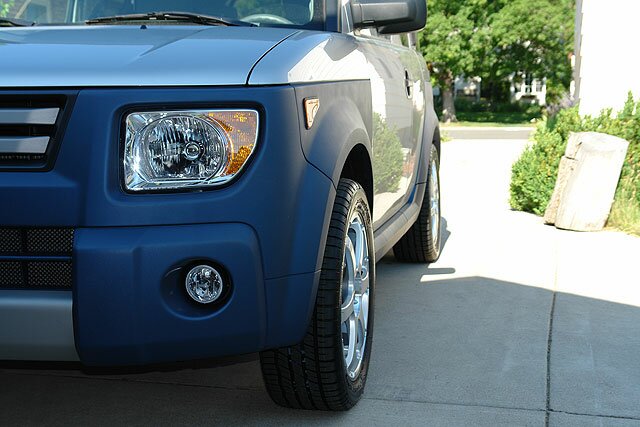
Before and after pictures of the car in this case study. You can see how it's transformed the look of the car. Note in the last set of pictures that the tyres sit further out from the side of the car than before. Here endeth the lesson.
 |
 |
 |
 |
 |
 |
7 days later
After a week of driving around on your new combo, get the lug nuts re-torqued to ensure they're still snug, and do a quick visual check on the wheel balance weights. If any of them are going to come off, they'll normally do it in the first few days of driving, and you'll need the wheels re-balanced.