
The car Bibles product reviews: VholdR ContourHD action / sports camcorder.
Product Reviews
VholdR ContourHD action / sports camcorder
Website: www.vholdr.com
Tested October 2009 
As of late 2009, there were a fair number of wearable/bullet/actionsports camcorders around, so VholdR have a tough market to crack. Their product - the Contour - comes in two flavours. The ContourHD, reviewed here, has two resolutions - 848x480 at 60fps, and 1280x720 at 30fps. The ContourHD1080p has two additional resolutions - 1280x960 and 1920x1080 which is full HD. Both cameras look the same outwardly, and have the same controls and functions. So how does the ContourHD perform against rivals such as the HTC2K and GoPro Hero, reviewed here? The star rating above should tell you, so here's the review in full. (Click on any image to see a larger version of it)
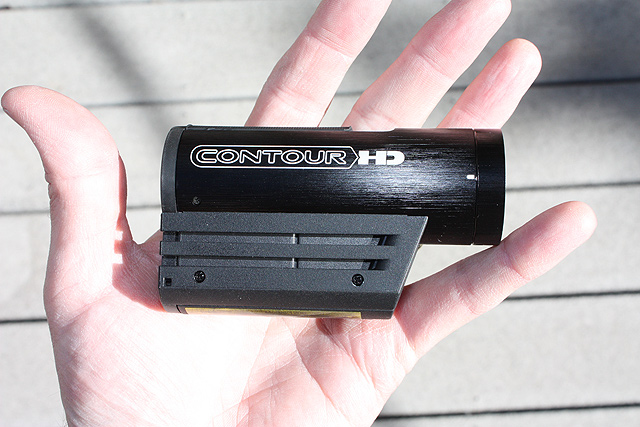
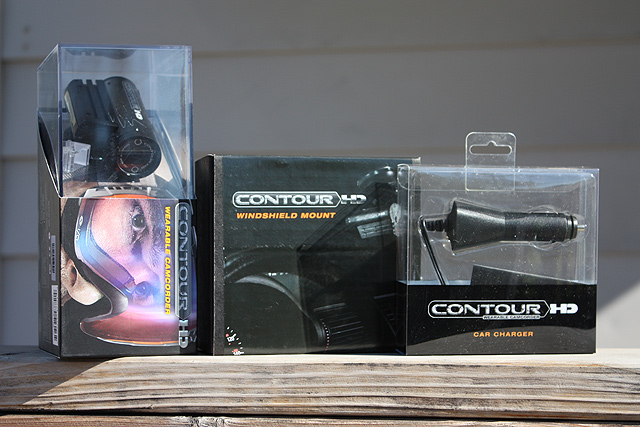
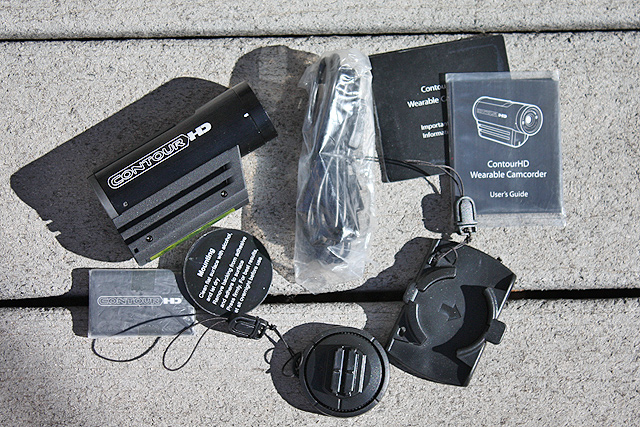
For this review I had a ContourHD, a car charger and the windscreen mount. Getting the camera out of the packaging is a bit of a Mensa challenge but once out, it's a neat, compact device that easily fits in the palm of your hand. In the box you get the camera itself, a battery, a USB cable, the flat surface mount, the helmet mount and a mini guide book.
 |
 |
 |
My immediate bone of contention was the proprietary rechargeable battery. For motorsports, it's not a problem - you can use the 12v car charger to recharge it, but if you're out on a motorcycling weekend, or skiing, kayaking, camping or doing otherwise outdoors activities, you either need access to a vehicle, or need to take a USB power adapter with you. (Or a laptop with a powered USB port). VholdR claim a 3 hour battery life, with the disclaimer that cold-weather use reduces this. In my tests, I got about 90 minutes out of it before it needed a recharge. That was split about half and half between a heated car and stuck to the outside of a motorbike in 40°F weather. Compared to the battery life of the GoPro Hero, which runs off AA batteries, the Contour seems to do a much better job. As a plus, the battery is nestled right in the middle of the camera itself rather than being stuck on the outside, so there's a moderate amount of insulation between it and the outside world. To save battery life, the camera turns itself off after 15 minutes of inactivity.
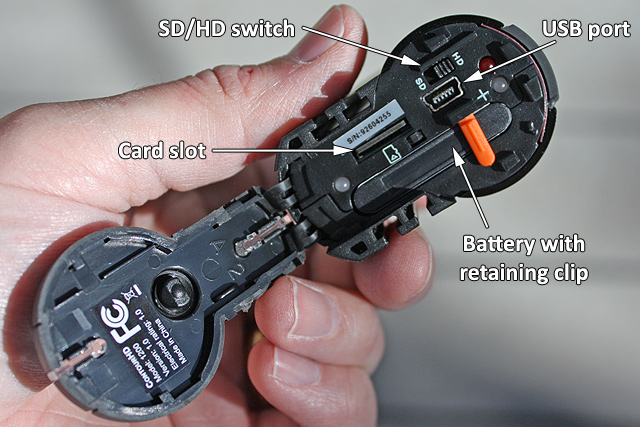
The camera takes microSD memory cards. It comes with a 2Gb card as standard, which is a plus point given most camera manufacturers give you a paltry 32Mb card as standard. You can use any size card up to 16Gb. The card and the battery are both fitted behind a rubberised backplate that slides up and off the back of the camera. This is also where the USB port and the SD/HD switch is located.
 |
 |
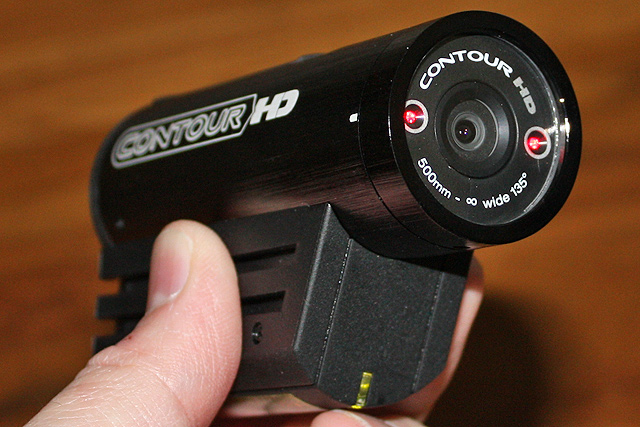 |
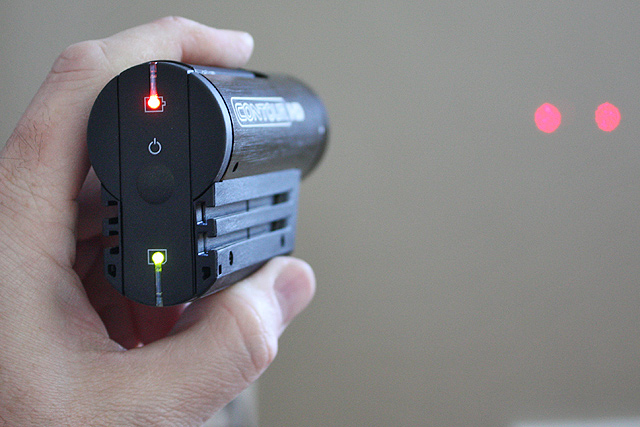
The power button is really a multifunction button. It powers the camera on and off (duh!) but it also brings in to play two of the key features of this camera. The first is status indicators. So simple, yet so useful. Push the button for a second when the power is on, and two LEDs light up on the back plate. One shows memory status, the other shows battery status in one of three colours: red (80%). Clever. But not half as clever as the sighting lasers - both of them. If you've ever used a mini camcorder like this, the most difficult thing is to figure out (a) where the hell it's pointing, and (b) whether or not it's level. The sighting lasers, in combination with the number one design feature of this camera help solve that problem. What's the number one feature? The entire lens and CCD assembly rotates +-90°. This makes it so unbelievably easy to get the camera aimed where you want it's a wonder nobody thought of this earlier. Mount the camera on your helmet, bike, car or whatever. Turn on the sighting lasers and level the lens and adjust the mount so it points where you want. Genius! Because the entire lens spins 90° both ways, there are detents at 0° and 90° clockwise and anticlockwise. In our test unit, the detent at 0° had a little slop in it but the entire assembly has so much friction in its design that it never posed a real problem. The lens never rotated on its own.
So what's it like to use?
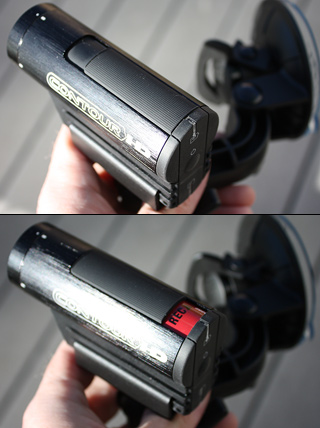
In a word - idiotproof. Unlike the other cameras I've reviewed, the record switch on this one is another stroke of design ingenuity. VholdR realise that for the most part, this camera is going to be used with gloved hands. So rather than a click-type on/off button and status light that is invisible in sunlight, they've gone for the mother of all slide switches. It's as long as the camera itself, and when on, exposes a huge red "REC" label so you're left in no doubt that you're in record mode. In HD mode, the ContourHD has 135° field of view so there's a lot of fisheye distortion. The picture is sharp in central 75% of view but becomes a little fuzzier at the edges. There is some mild vignetting apparent in corners - where the picture gets darker towards the edges - but it's not too bad. The VholdR tech support site indicates that if it's properly dark, it could be a misaligned lens.
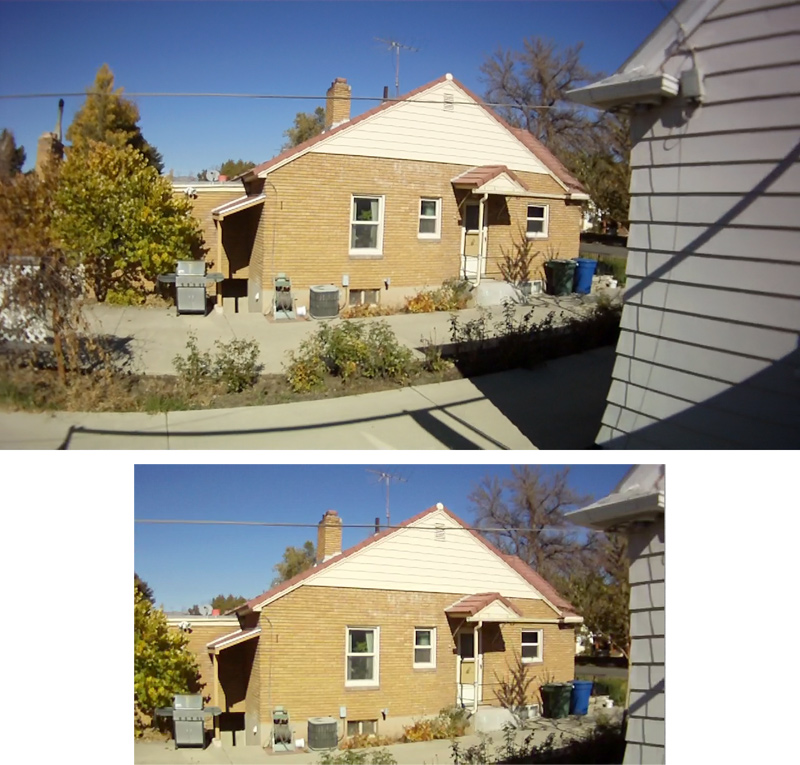
In SD, the field of view is much narrower - 90°. This means a lot less fisheye distortion, negligable vignetting and an image which is sharper further out to the edge of picture. The image on the right here shows a comparison of the same scene shot in HD and SD modes.
To use the camera, you'll want to mount it to something - your car, motorbike, snowmobile, helmet - whatever. The mounting system for the camera is split into two basic components. The grooves down the side of the camera itself allow mounting plates to be slid directly on to the camera body. The circular helmet mount comes with a self-adhesive patch to stick one half of it to a helmet. The two halves clip together fairly securely and a patch of hook-and-loop (velcro to you and me) in the middle secures the deal. Once mated, the two halves don't come apart without a fight. The other mounting option is the flat surface mount, which is a much larger, rectangular block, also with a self-adhesive patch. The camera part of the helmet mount is re-used here, fitting into the flat surface mount with a very, VERY secure snap. A series of teeth around the outside of the mount allow you to determine which angle the camera is mounted, but you can't twist the two mounting parts relative to each other once they're engaged. You need to pull the camera out and re-insert it. The flat mounting plate grasps the camera so tightly that every time I went to pull the two apart, it always felt like I was about to snap one or other of the plastic mounting components. For future models, a spring-mounted button might be more appropriate for this particular option.
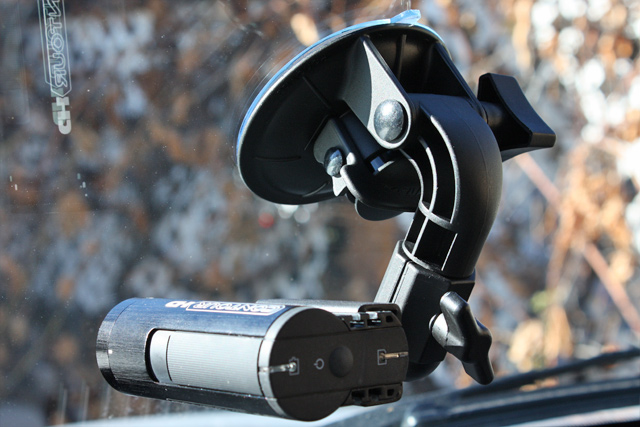
For my test I exclusively used the windscreen suction mount. Whilst the mount for the GoPro hero has lots of doodads, arms and thumbscrews to get the camera into the right position, the VholdR take on this particular idea is much simpler. One knob releases the main angle arm. The second knob releases a pivoting, spinning ball joint with a U-shaped clamp on the end. You can very quickly get the right angle using just these two joints, and anything you can't compensate for is dealt with by the rotating lens assembly and sighting lasers. The camera slides into the U-shaped rail so tightly that the two locking screws provided will likely never be needed. So simple. I love simple.
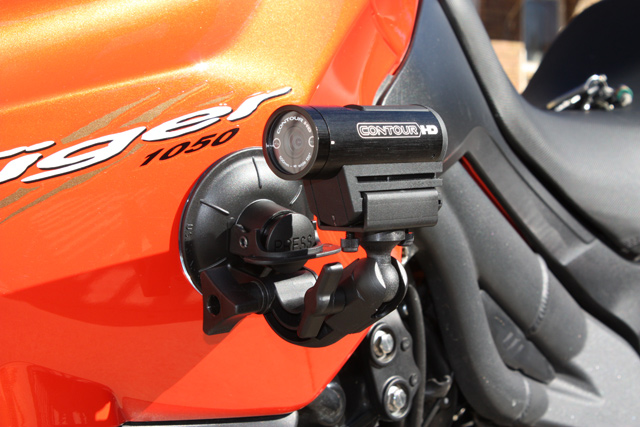
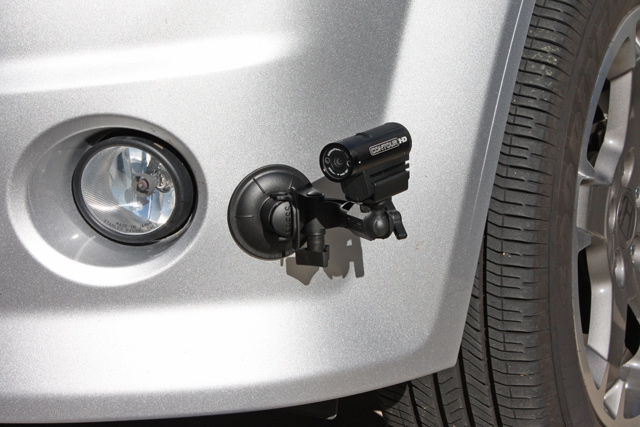
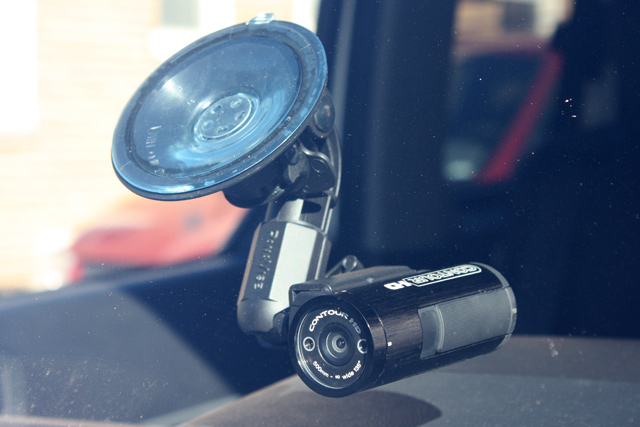
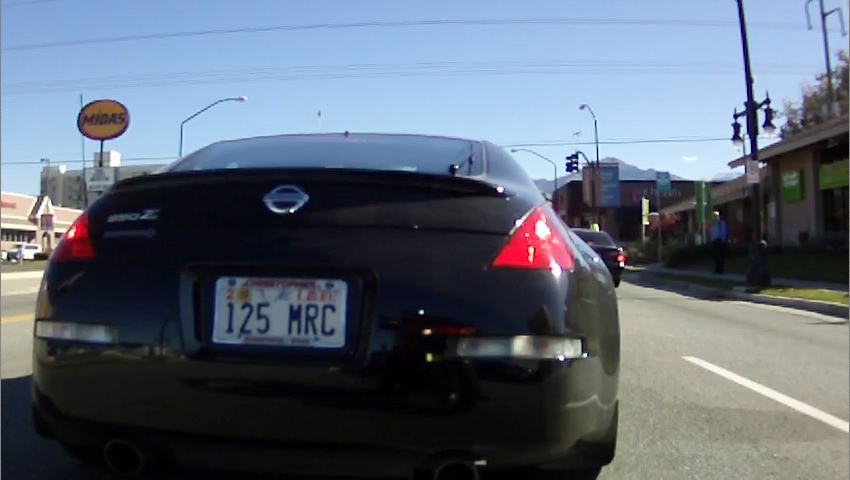
The suction cup will stick to just about any smooth surface that is mostly flat. The suction cup rubber is very pliable, and the mechanism to get it to stick works extremely well, giving it a limpet-like grasp that is extremely hard to break. I've used this exact mount before on everything from rough tracks to 130mph speed runs, stuck on everything from bodywork, to fuel tanks to windshields. If you attach it right, it absolutely will not come off until you want it to. Below are three examples of mounting positions I've used with this suction cup. The windshield and motorbike mounts are how the vidoes for this review were shot. In the front shot through the windshield, you can see the lens assembly rotated 90° to one of the detents. The bumper mount is great for track days but you need to remember to start recording before you drive off. Don't ask me how I know this.
 |
 |
 |
 |
Connectivity and video editing
When plugged in to a USB port, the ContourHD, simply shows up as a mass storage device. You can drag and drop the videos to wherever you want and work with them however you want. The connection is USB 2.0 so it gives a relatively quick file transfer. I measured about 55 seconds for a 325Mb transfer. VholdR do provide their EasyEdit desktop software as a download link on their site. Handily they provide a URL for this in a basic HTML file stored on the 2Gb card that comes with the camera. The download is small - 6.9Mb and it installs quickly. On two PCs I tried it on though, it takes over a minute to start up if camera is connected. If started on its own, it comes up right away but there's about a minute pause once the camera is plugged in. It's an annoyance but nothing more. The software gives you the option of creating a free account with VholdR which allows one-button video sharing on their site. The first time you plug the camera in with the software running, it will set the internal date and time on camera.
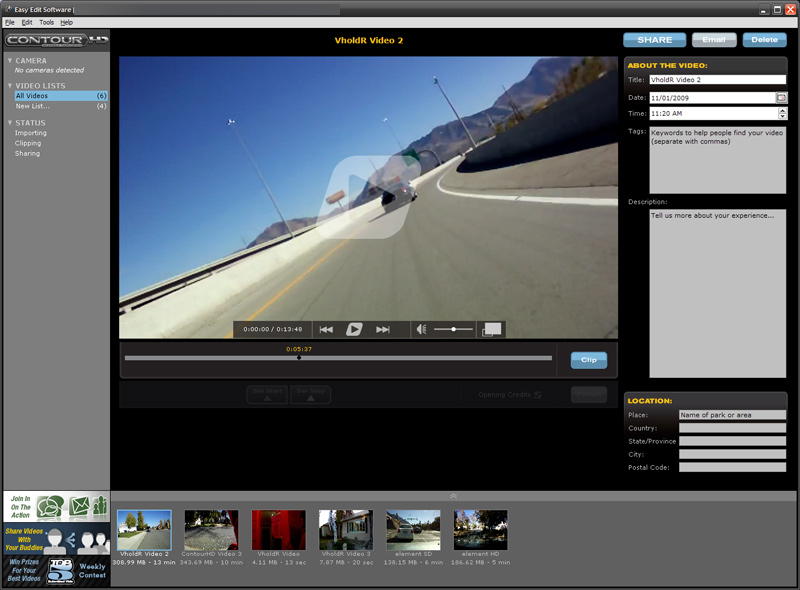
The software is pretty simple to use and is designed as a "get you going" editor rather than a serious video editing suite. It lists the camera type and videos on the left and shows videos on the right. Rather than dragging and dropping in mass storage mode, you can use the software to import the videos instead. Selecting 'video' and clicking 'import' asks for a bunch of descriptive fields to be filled in - basically video metadata to help you file / locate videos later on. Videos are stored in 'My Documents/VholdR Videos' although you can use the file menu to choose a different location if you want.

Selecting an imported video brings up any metadata and a preview window. Oddly, playing videos inside the software resulted in stepping and skipped frames for me, whereas simply letting Quicktime play the videos outside the editor gave me hiccup-free playback. As far as I can tell, the best use of the EasyEdit software is for quickly clipping videos up into smaller pieces - basic editing. Clipping a video is pretty simple - click the 'clip' button then drag the slider to set start and end points. Set title of new video and clip it. The software stacks up requests and processes video clips in a queue. If you check the 'opening credits' tickbox prior to clipping, then a popup title appears in the first couple of seconds of the resulting video.
Clipped videos are considerably smaller and lower bitrate than the raw source videos, even when high quality rendering engine is selected in the options. So the resulting clips are good for sharing, but a proper video editing solution is required if you want to maintain quality. If you get serious about your video clips, you'll likely end up ditching EasyEdit as you get the hang of something like Sony Vegas Pro instead. Alternatively, for simply clipping up your videos, grab an Apple Quicktime Pro license and use their 'trim to selection' function before re-saving the file. That way you don't lose any data.
Video samples
The videos that the ContourHD shoots are stored in Quicktime .MOV format with very low compression - meaning very big file sizes. This is absolutely a good thing. I've provided some samples here to download. For comparison, the motorbike videos were clipped using Quicktime Pro, and the car videos were clipped using VholdR's EasyEdit software.
SD sample, windshield mount inside car
HD sample, windshield mount inside car
SD sample, side of motorbike, accelerating
HD sample, side of motorbike, accelerating
HD sample, side of motorbike, at speed
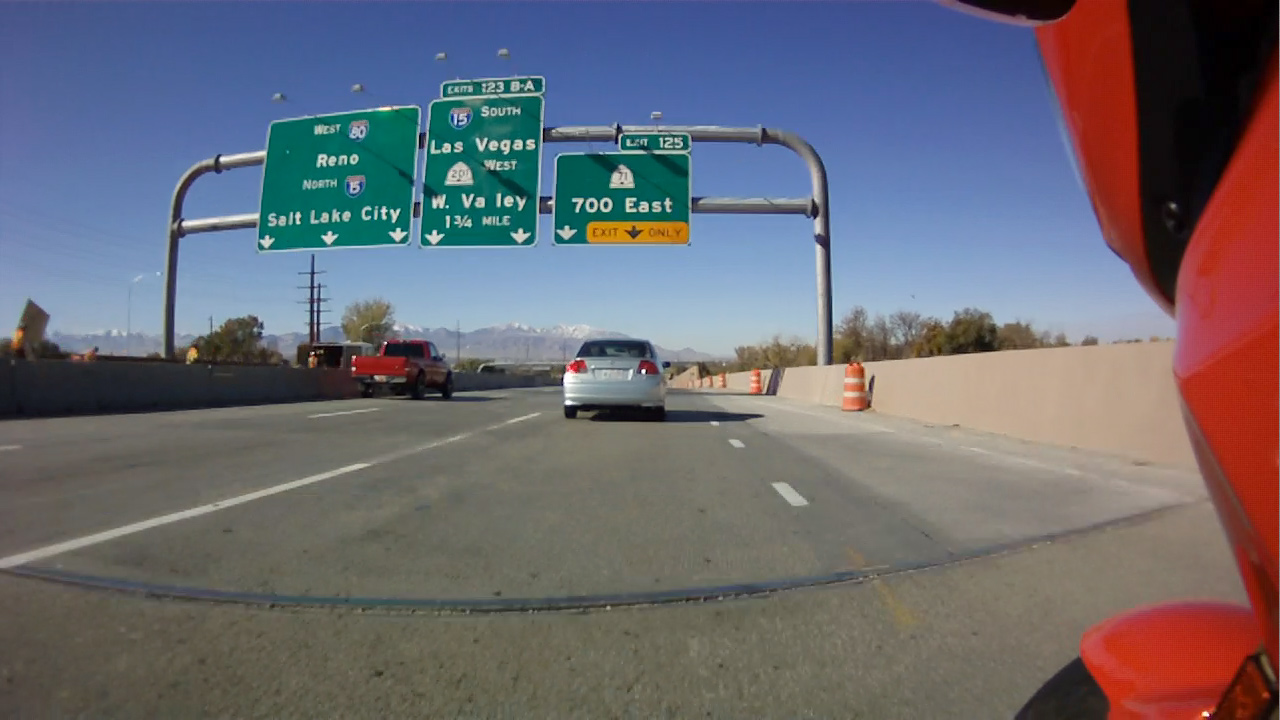
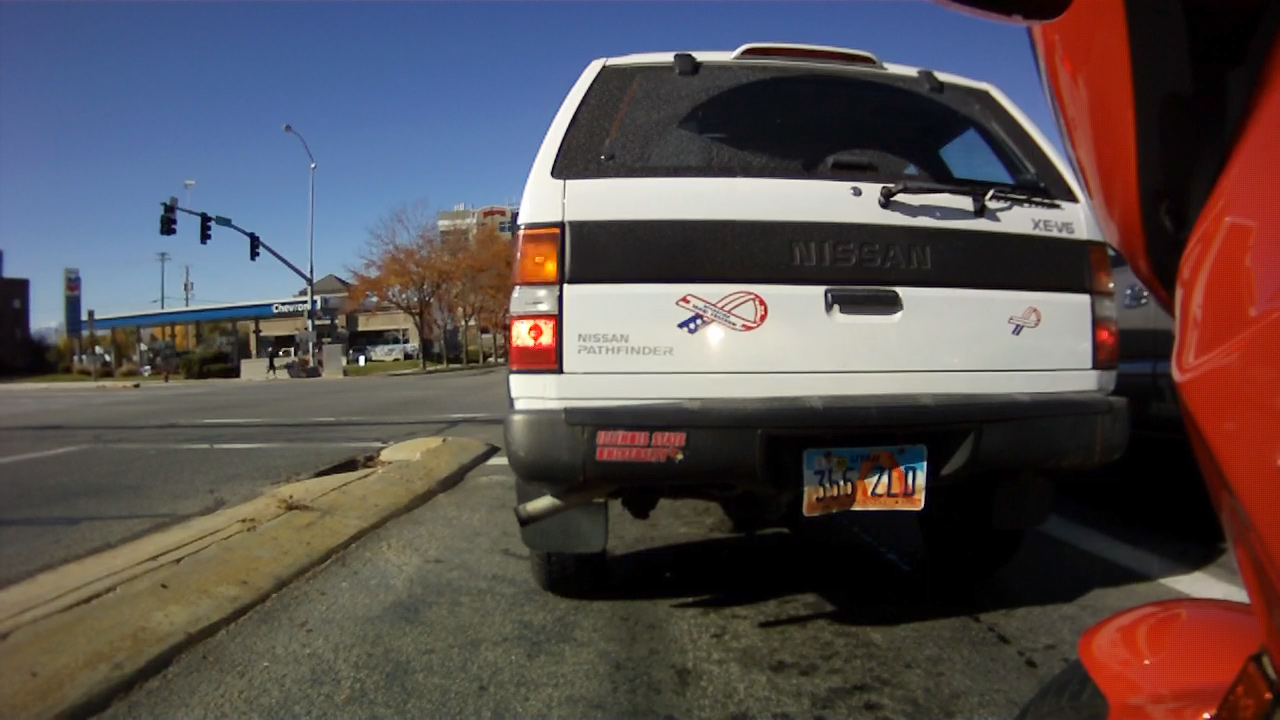
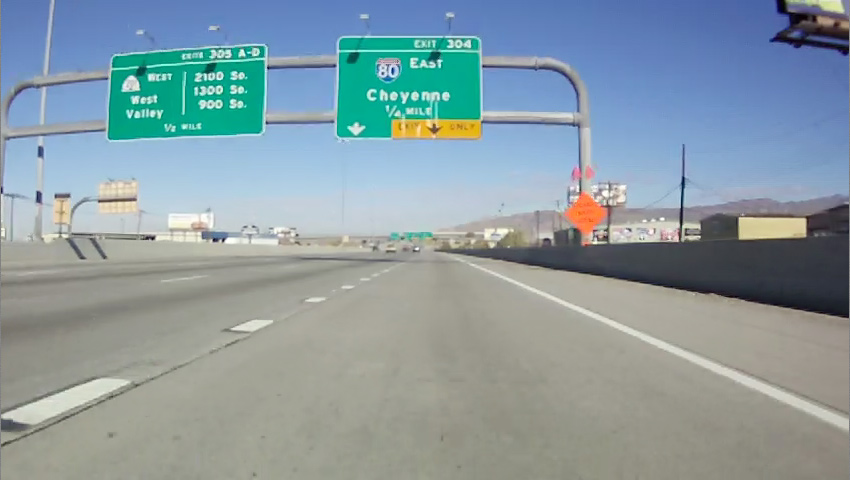
Because it's awkward to do a picture comparison with moving video, the following are four full-frame screengrabs from the raw video straight out of the camera. The first two are HD, the second two are SD.
 |
 |
 |
 |
Results
From the clips posted above you can see that the audio is pretty muted when inside a vehicle. I had the music up pretty high and my car isn't especially quite on the road-noise front. You need some serious noise before the mic begins to pick it up. I guess because this camera is designed primarily to be on the outside when it's being used. In the motorbike acceleration clips, you can hear the engine and road noise quite clearly up to about 20mph at which point the wind noise becomes all-consuming. That's a biggie - the wind noise. It's the main reason I knocked half a star off the score. Sure if you're going to post-edit the video and add your own soundtrack, it's not a problem, but if you hunt the VholdR support forums, there are dozens of topics going on about how to reduce wind noise either on-camera or in post-editing. The most common answer is "take it apart and solder in an external mic connection or re-pad the internal mic".
From a video perspective, on a stable platform, the difference between 30fps and 60fps isn't anywhere as noticable as I thought it would be. Even on a buzzy, vibrating platform like the side of the bike, picture was remarkably stable. Neither mode suffers the 'wah wah' picture distortion evident in earlier cameras I've reviewed. The wider angle HD mode, when used on the bike, was awesome because it picked up some of the side of the tank and front wheel so you could see suspension movement and tyre spinning. The overall quality is remarkable for a point-and-shoot motorsports video camera at this price and despite my reservations about the fish-eye distortion in HD mode, in the end I did prefer the wider angle despite the lower framerate - it gave a much better impression of speed.
Conclusion
Good points:
- Idiotproof record/stop slider switch
- Easy-to-use one-button design
- Battery and memory status indicators
- Excellent suction cup mount
- Sighting lasers and rotating lens are genius
- SD and HD videos are a joy to behold from a camera this size - remarkably consistent quality
Bad points:
- Wind noise is all-consuming above 20mph
- Flat surface mount feels like it's going to snap every time you use it
- Proprietary battery means access to a vehicle 12v supply or a PC w/ powered USB
- HD video is good, but fuzziness at edges and fisheye effect could be distracting
- Audio is quite muted when inside a vehicle
- The record/stop slider switch is so positive in its action that there's an audible click at the end of every video
- Editting software is basic, but it does the job
On the face of it, you'd think the bad points outweighed the good points, and whilst the wind noise and proprietary battery are biggies for me, I'd be willing to find ways around them because of the quality and consistency of the video. In fact you'll notice almost half the bad points are audio-related. So 4½ stars out of 5. And would I recommend it? I believe the expression is "Hell Yes". It's one of the occasions I've been bummed that a company wanted the demo unit back.